Two of the most consistently popular topics from my Pinterest boards lately have been sustainable packaging and furoshiki, so I thought I’d combine those two topics with a timely twist and explore sustainable gift wrap.
You’ve probably heard the oft-quoted statistic that if every American family wrapped three presents in reused materials, it would save enough paper to cover 45,000 football fields. That statistic is kind of overwhelming when you think about it, but just like with anything else, you do what you can with what you have where you are. For me, that starts with using re-usable gift wrapping whenever possible.
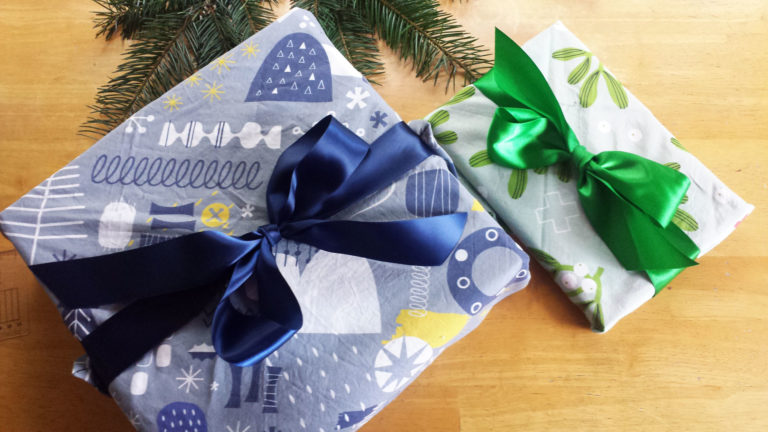
A couple years ago I switched from using wrapping paper for most of our holiday gifts to using cloth wrapping, and while we’re not perfect about it, it does feel really good not to be throwing away bags of barely-used wrapping paper on Christmas morning.
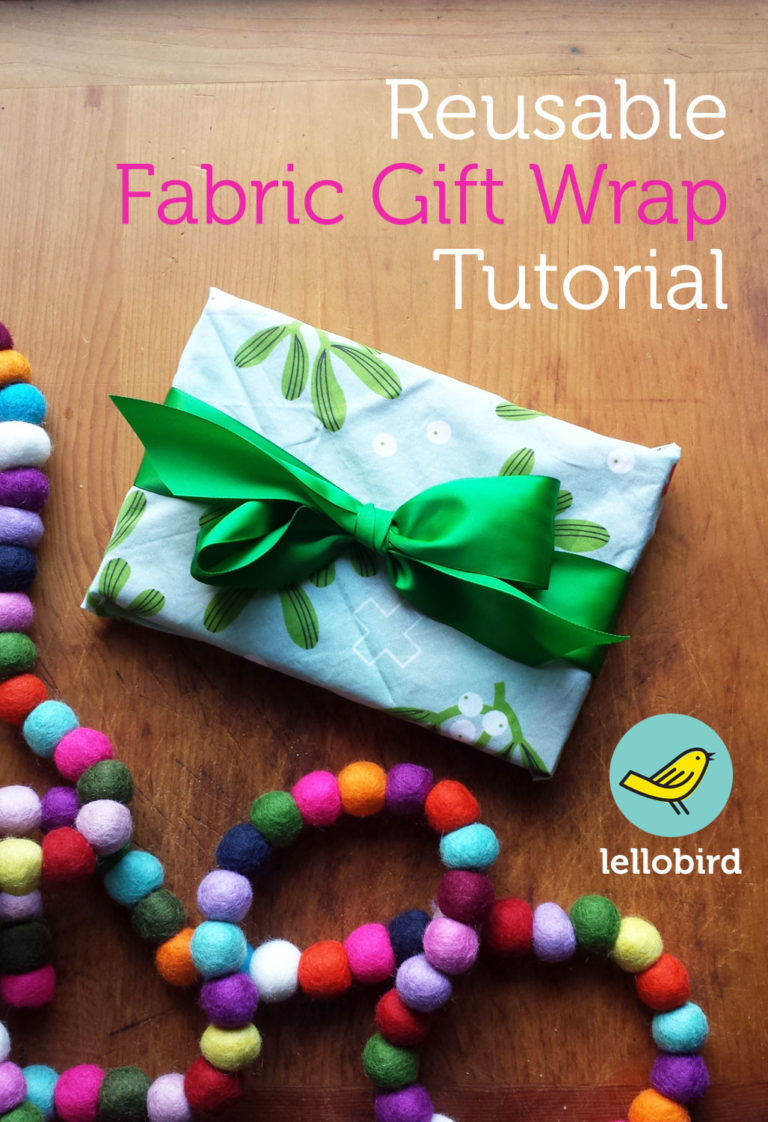
The simplest way to wrap gifts using fabric is just to use a square or rectangle of fabric, either hemmed or cut with pinking shears, which you can use pretty much the same way you’d use a piece of paper to wrap a gift, and then tie it up with ribbon (or get fancy with furoshiki).
The first year we used fabric wrapping, I made simple bags (basically just a piece of fabric folded in half and hemmed on two sides) that can be tied off with ribbon. They sew up fast, work great and are still going strong. If you want to get fancier, try making a bag with an attached ribbon, a drawstring bag or this cute fabric gift bag with a built-in ribbon from A Quilter’s Table – it’s next on my list of ideas to try.
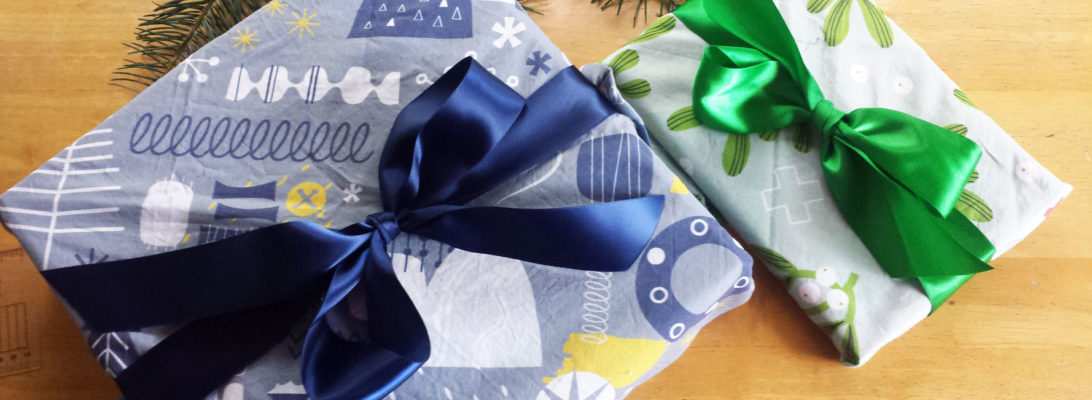
This year I decided to try to make some wrapping with the ribbon built-in, to make wrapping extra simple. It’s very simple – just a square of fabric with ribbons attached at two opposite corners – but it wraps up into a pretty official-looking gift.
My first attempt started with a 36×36″ (about 91.5 cm square) piece of fabric, which would be great for bigger gifts, but kind of overwhelmed a book, which is a pretty common gift from me. So on version 2.0, I started with a 20×20″ (about 51 cm square) piece of fabric, which was much more manageable (and, if you’re starting with a yard of fabric, leaves you with a 16″ wide strip you can turn into a gift bag). You can scale the square up or down depending on what you’re wrapping.
For each wrap, you’ll need:
– 20″x20″ piece of fabric (or size of your choice)
– 4 feet of matching ribbon
– thread
A note on fabric: I used regular old cotton, because that’s what I had on hand, but it might be nice to use a fabric with a little sheen to it, like Spoonflower’s Organic Cotton Sateen – just don’t use anything too thick or it will be hard to wrap.
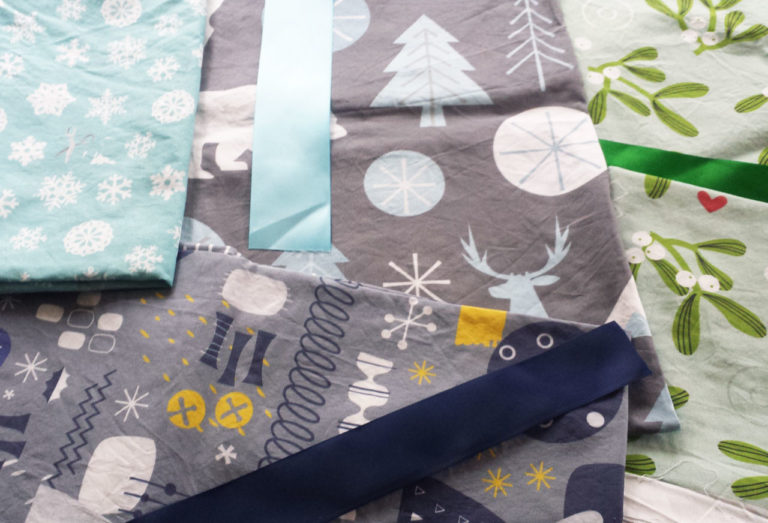
A note on ribbon: I used 1.5″ and 2″ wide satin ribbon, because it has a nice shine and it’s what they had at the fabric outlet I frequent. To keep the ribbon from fraying, you can melt the ends ever-so-slightly with a flame – now, normally putting me and a flame together is a bad idea, but I managed to seal up the ends of the ribbons without incinerating anything – the trick is to put the ribbon near the flame but not in it, and keep it moving. WikiHow (scroll down to the third option) has pretty clear instructions. Whatever method you choose, start with sharp sewing scissors so you get a clean cut, and cut at a 45-degree angle, either across the ribbon or with the ribbon folded in half to make a notch. (Btw, if you need tips for tying a pretty bow with that ribbon, check out this video.)
Here’s what you do:
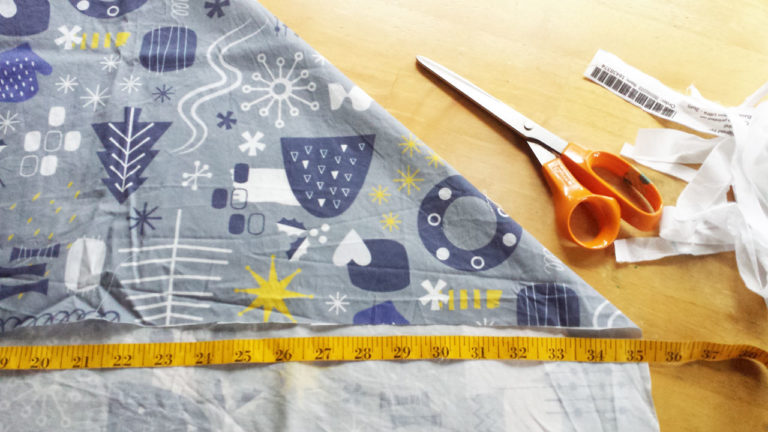
1. Trim off any selvage (side note: The British “selvedge” just makes so much more sense than the American spelling, doesn’t it?) and cut your fabric into a square.
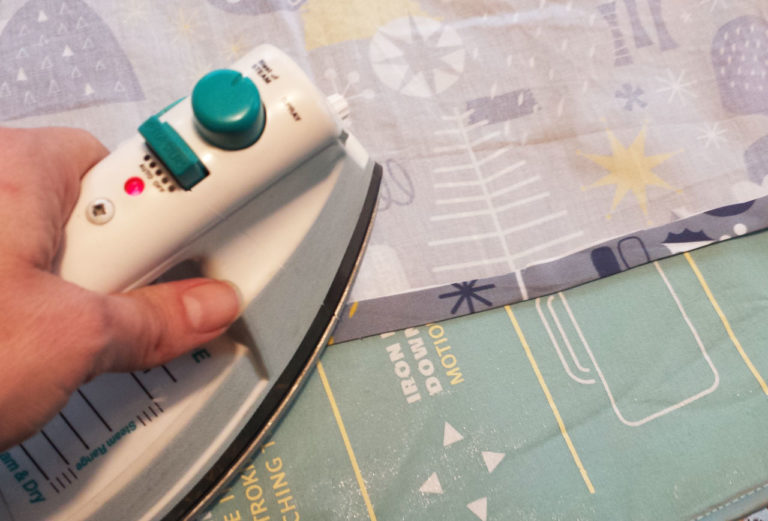
2. With the right-side of the fabric down, press up 1/2″ all the way around.

3. Because I wanted to practice mitred corners, I took the extra step and sewed mitred corners. I could try to explain to you how to sew a mitred corner, but By Hand London does it much better. If you find mitred corners daunting or fussy, skip it and just make square corners. Most people will be so impressed that you made wraps that they won’t care about the corners. If you’re not doing mitred corners, just fold and press another 1/2″ all the way around to give it a nice finished edge.
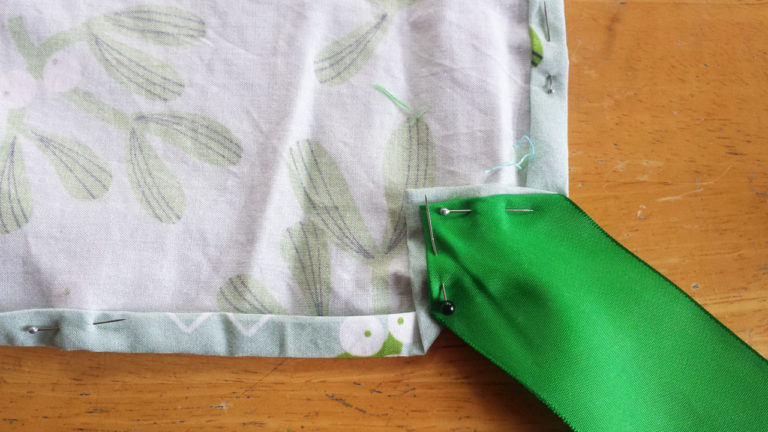
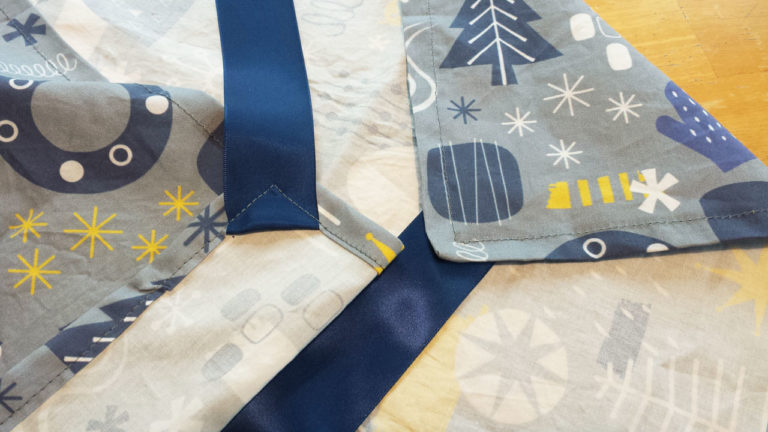
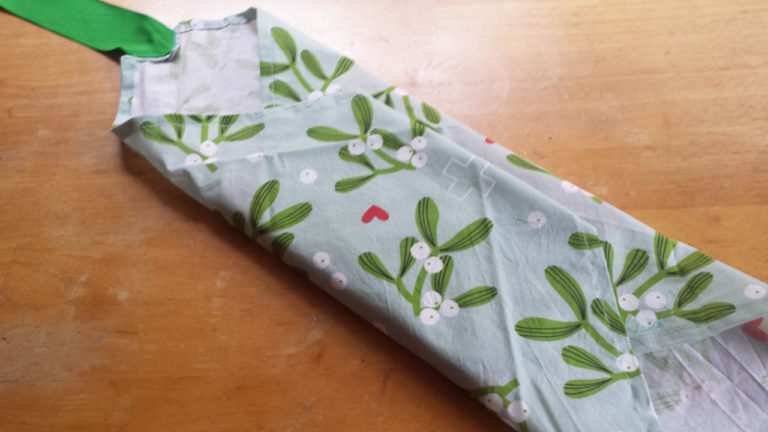
4. Fold one corner toward the wrong side if the fabric, making a little triangle, until the base of the triangle you’re creating matches the width of your ribbon (just look at the picture; I can’t explain it).
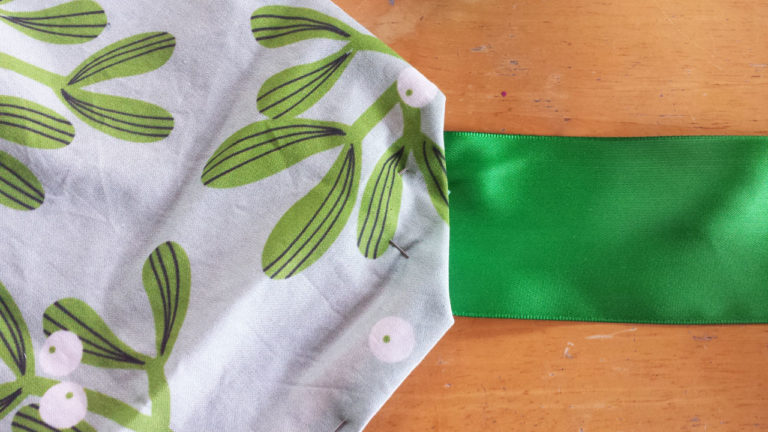
5. Pin the ribbon on top of your corner/triangle, folding the raw edges of the ribbon under. Make sure if your ribbon has a wrong side that the wrong side is facing up (so your fabric wrong-side and your ribbon wrong-side are the same direction).
6. Repeat on the opposite corner.
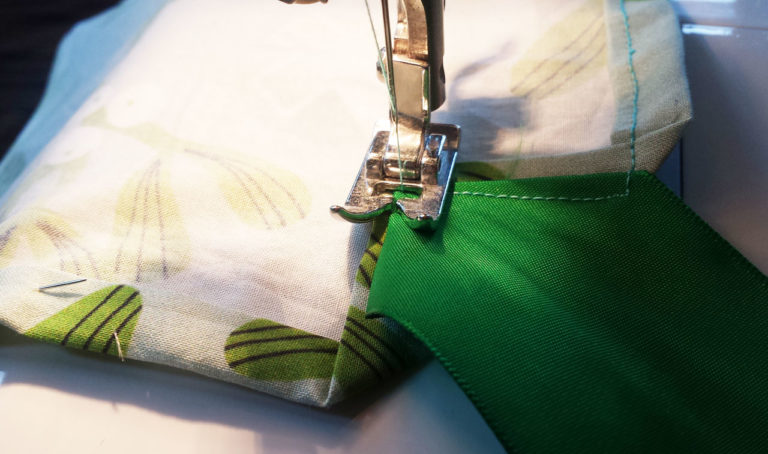
7. Whether you’ve mitred or not, sew all the way around the hem, ducking in on the ribbon corners to follow the edge of the ribbon.
That’s it! It took me about an hour to make one wrap, but that time included figuring out what I was doing as I went along, setting up my Spotify playlist to accompany my sewing, burning myself on an iron, discovering the machine was threaded wrong and having to rip out my seam and start over…so, really just a typical day sewing for me, but I think it would get faster with each iteration.
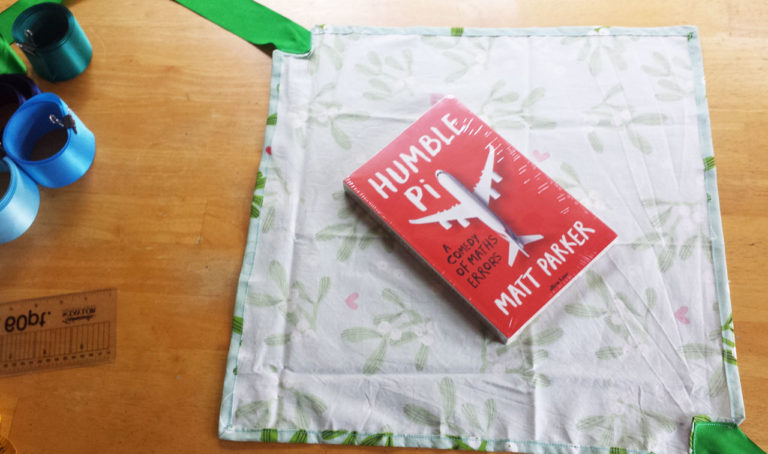
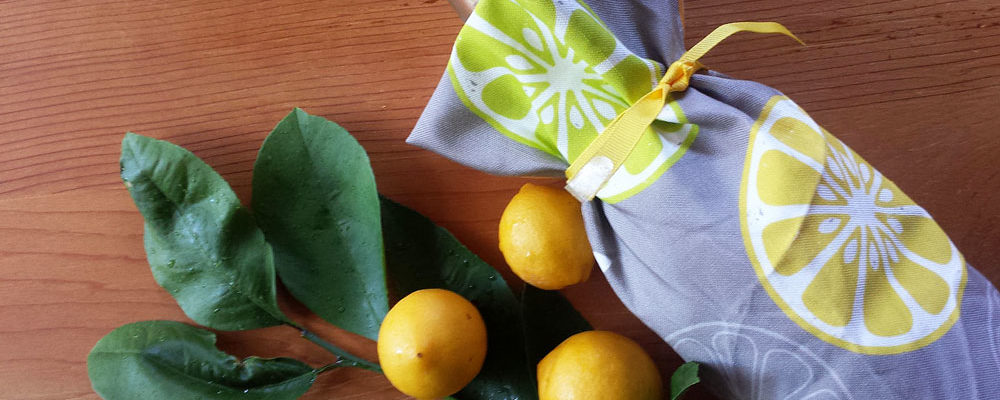
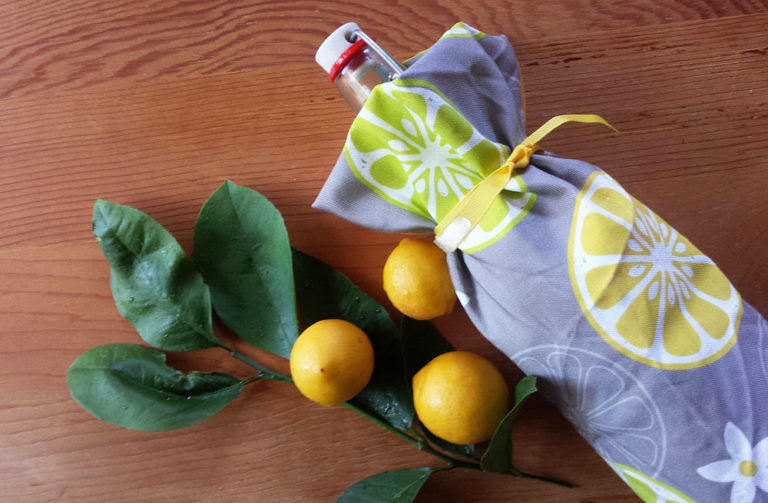
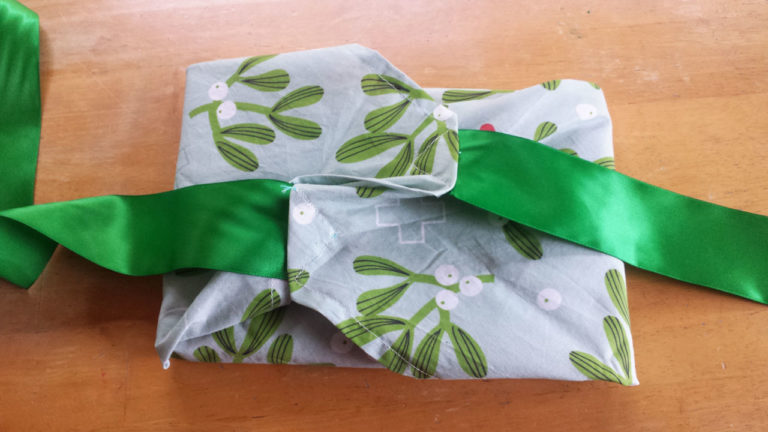
To wrap, lay your item diagonally in the middle of the cloth. Fold in the top and bottom (the non-ribbon corners). Then criss-cross the ribbon corners over the back (you can tie them in a half-knot, but it seemed bulky to me). Pull them around to the front and tie in a pretty bow. If your item is smaller, wrap the ribbons around in the other direction, too, before tying.
Note: If I cared terribly about surprises, I might line this wrapping, in which case you don’t need to do mitred corners; you can just put the two pieces of fabric right-sides-together and sew them together, leaving a little gap to turn it right-side-out and then top-stitch it all the way around. You could even make it reversible by lining it with a contrasting fabric. It will be a little bulkier when wrapping, though.
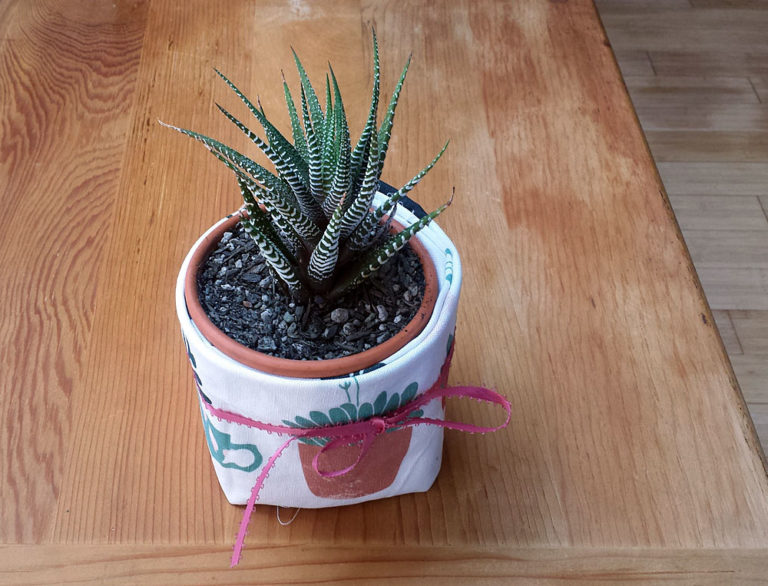
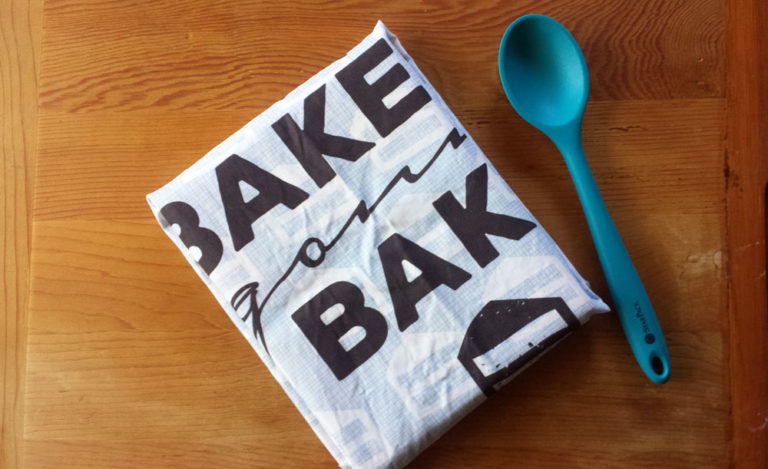
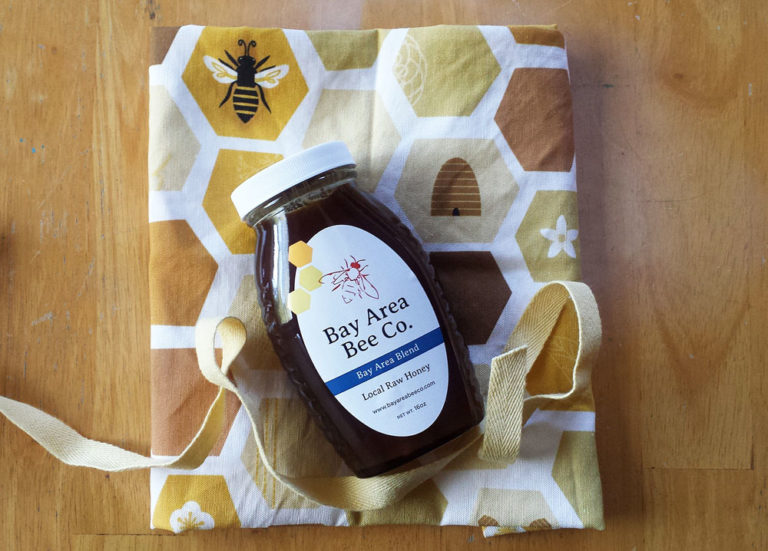
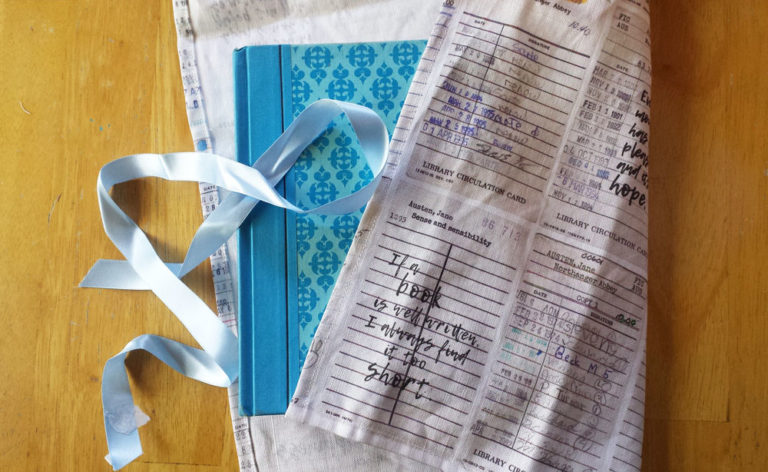
If you’re not up for sewing, there are lots of other options for re-used or reusable wrapping, from magazine pages to mason jars. Or try wrapping gifts in pre-made tea towels like these from Trader Joe’s or IKEA – or, you know, something fancy. There’s even a tutorial for making pretty no-sew fabric bags using double-sided tape, if you’re a seat-of-the-pantser.
Lastly, if you want something sustainable inside the wrapping, too, consider these gift ideas from Imperfect Foods – or, as I heard it put the other day: Eat it, drink it, spend it, burn it.
Whatever and however you celebrate, I hope you have a fabulous end to 2019 and a happy, healthy 2020!
Fabrics used:
The Lost Mitten Barkcloth
Smoochies
Frosty Frolic
See more of my wintry designs here.