Two quick tips for Spoonflower designers

All Lellobird designs on throw pillows

All Lellobird designs on throw pillows
I see variations on this question asked so often in Spoonflower groups that I decided to make a blog post I can send people to, because these two tips have been very useful to me and I’ll bet they’ll help you, too!

How to link to just your designs on a specific type of product
When, for example, Spoonflower is having a sale on fat quarters and you want to show people all your tea towel designs on tea towels with one link, what’s a designer to do?

The short answer is, replace my designer name (“lellobird”) with yours at the end of this link: https://www.spoonflower.com/en/shop?on=teaTowels&designer=lellobird

The longer answer is:

  1. Use the Spoonflower menu to go to the product category you want, like Tea Towels. For example, use the main menu to go to Dining > Tea Towels.
  2. Click the “Shop All Tea Towels” (or whatever category it is) link, so you see the “Filters” options on the left.
  3. Add “&designer=yourname” (without the quotation marks, and replacing yourname with your designer name) to the end of the URL that comes up.
  4. Copy that link and share it with everyone!

Tips:

  • If you’re comfortable with how URLs work, you can adjust the parameters or take out things like the “sort” and “availability” parameters to shorten it. (And if you’re not comfortable with them yet, play around with it – it’s the best way to learn!)
  • From that “view all” page, you can get to other categories to find out what they’re called by clicking on a category under “Products” on the “Filters” menu on the left. It should continue to display only your products, but if not you can just copy the product category name from the URL that comes up and just replace that part of the URL you made with, for example, “duvetCovers” or “squareThrowPillows” – easy-peasy!
  • If your designer name as a space, a character that’s reserved for making URLs function (like “&”) or a non-standard (according to the American keyboard, anyway) character in it (like “é”), you’ll need to replace that space or character with the correct code using percent encoding – for example “%2B” is “+” and “%20” is a space.

How to display everything with a specific tag on a product, even if the designs aren’t in the same collection
Maybe you want to show off work from several designers who have collaborated, or you want to show shoppers all the calendar options. Here’s what you do:

  1. Start with one of the custom URLs you created above, like https://www.spoonflower.com/en/shop?on=teaTowels&designer=lellobird
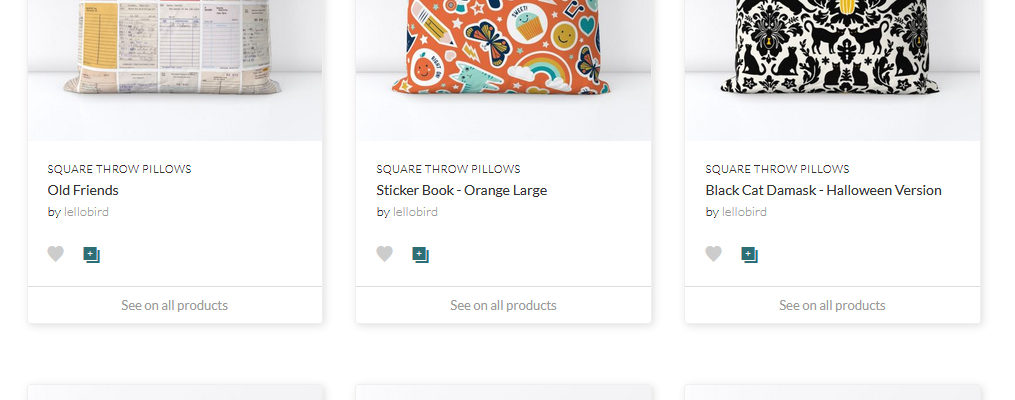
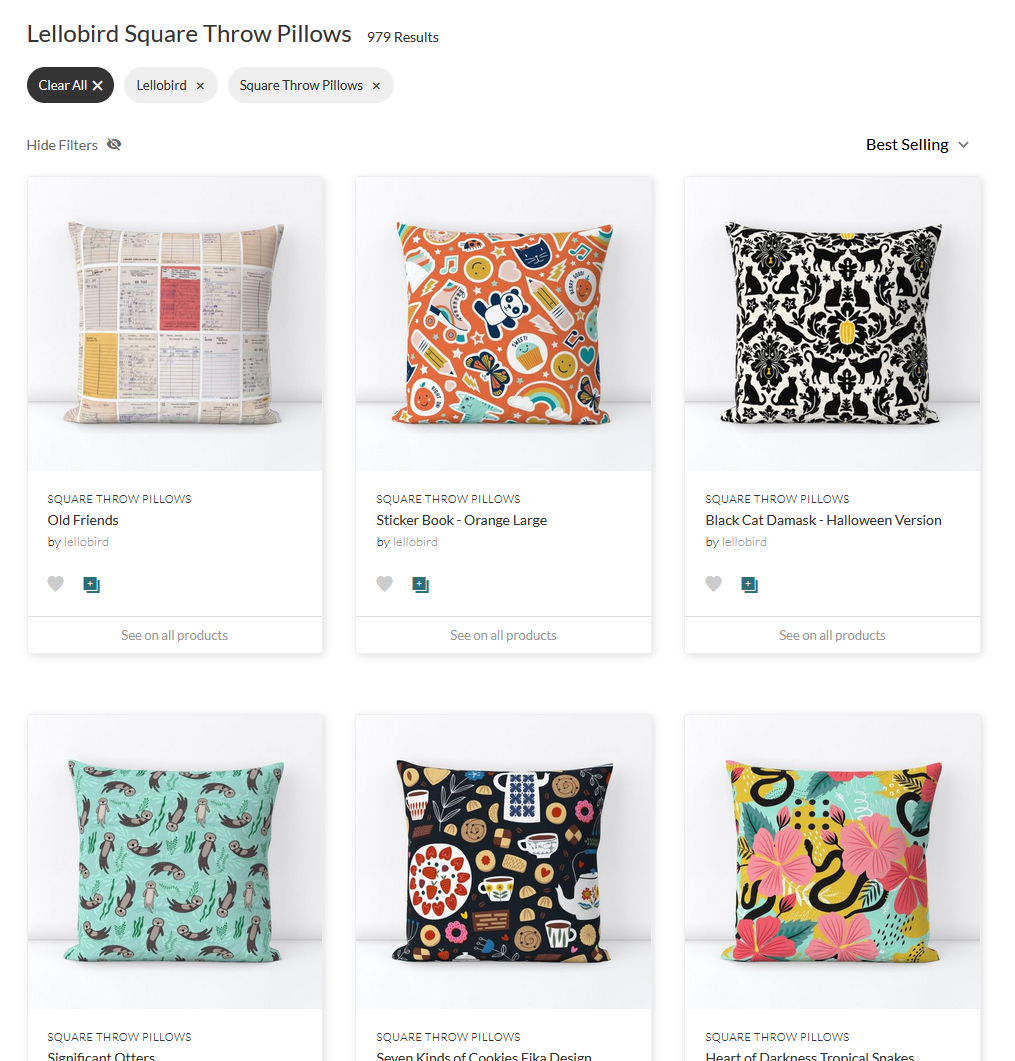
  2. Instead of “designer=yourname” at the end after the &, replace it with “q=tag” where “tag” is the search term you want to use. For example, this URL gets you everything tagged “mcm” shown on throw pillows: https://www.spoonflower.com/en/shop?on=squareThrowPillows&q=mcm. And this one gets you everything tagged “calendar” on tea towels: https://www.spoonflower.com/en/shop?on=teaTowels&q=calendar

Tips:

  • If you’ve used a tag that’s completely unique to you, like your designer name, this trick will display only your designs.
  • If you’ve given everything in one of your collections a tag that’s completely unique to you and that collection, this trick will display only your designs from that collection.
  • Be aware that if someone else uses your “unique” tag at some point, their design(s) will also appear at your link.
  • If you just want to display the designs on fabric and not a pre-made product, use “fabric” after the “on” parameter – e.g., https://www.spoonflower.com/en/shop?on=fabric&q=bibliophile

What’s your top tip for other designers? Or a question you haven’t been able to figure out the answer to? Let me know and we can all help each other learn!

Choosing a 100 Day Project

Mind map for brainstorming a 100 Day Project

Mind map for brainstorming a 100 Day Project

The 100 Day Project launches next week, April 7, 2020. And, of course because I’m a pantser, to borrow a term from NaNoWriMo, I didn’t officially decide until yesterday what my project this year is going to be.

Thinking ahead 100 days seems extra poignant this year – personally, I feel a little anxiety but also a strong sense of hope in looking ahead that far, and realizing that there will be an end to all this craziness, whenever that may be.

“The great surrender is the process; showing up day after day is the goal. For the 100-Day Project, it’s not about fetishizing finished products—it’s about the process.” – founder Elle Luna

This year more than ever I feel like really getting into the process of making is beneficial for me – losing myself in art for a little while helps keep me sane.

This might be a good year to do a collaborative project – like drawing the same thing as a friend every day, or emailing a friend a drawing for them to finish, or making up prompts for each other, or illustrating your friend’s song or poem – as a way to keep in touch with someone you can’t see in person.

For anyone else still on the fence about what to do, I thought it might be helpful to take you through my process selecting a project, and a few of the things I learned doing the 100 Day Project for the first time last year.

I spent some time reading other people’s assessments of their own projects and pondering my experiences. I think this line from Annabel Tempest sums it up nicely: “although [it] didn’t make masses of perfect work it did make masses of perfect moments.” If you think of it not as turning out 100 professional-quality projects but as a journey, it takes some of the pressure off. Last year I learned a lot not just about weeds and about drawing plants and using gouache and hand-lettering, but also about the places around me, and my work ethic and style.

The great thing about this project is that there are no rules – it’s all about personal growth, so if you miss a day or change your mind halfway through or whatever, it’s okay.

Here’s my process:

Brainstorm.
Look at your hobbies (existing ones or ones you’d like to develop), cruise through other people’s past projects online, start a Pinterest board of images that inspire you.

Ask yourself:

  • What am I curious about?
  • Is there a skill I’ve been wanting to learn or develop, like hand-lettering or knitting?
  • What do I have on hand? What do I want to use up?
  • Is there something I’m aspiring to, like children’s book illustration, that I’d like to add to my portfolio? (I heard someone – I wish I could remember who – say the other day, “Make the kind of art you want to sell.” I can’t decide if that’s brilliant advice or incredibly jaded – probably a bit of both.)
  • What’s interesting in my house or neighborhood?
  • What wouldn’t I mind drawing or exploring 100 times??

Some ways to brainstorm:

Take a look around.
Last year, I looked at all the weeds in my yard and at the baseball and soccer fields where I spent every weekend minute watching my kids’ games, and realized I wanted to know more about them.

This year, stuck at home, my top three ideas all came from looking around my studio and thinking about what I had on hand. I love ephemera, and have a big collection of outdated library circulation cards (you’ve probably seen my fabrics and prints), as well as pretty but dilapidated old books (too many of them, according to my husband), a bunch of old stamps and a jar containing pretty much every fortune cookie fortune I’ve ever gotten, as well as those I’ve begged off friends and family.

Doodle.
Because I’m a visual person (duh), I like to brainstorm with thumbnails – I’ll take a blank sheet of paper and draw a million little doodles and ideas, with one thing leading to another.

Map it.
When my kids were in preschool, their teachers used to help them figure out what the class should explore next using mind maps. They’d ask the kids to come up with a topic, and then the class would brainstorm related ideas that they’d write down on clouds shooting off the main idea, until they had a whole web of ideas and angles to explore. I’ve used this same method while leading a meeting with a multi-national company to help them figure out what info needed to go on their website, so it’s pretty flexible. This technique is actually a good analog for how my brain works, so it works well for me and helps me corral ideas a bit around a theme. (example above)

Make a list.
If you’re more of a linear thinker, a list can be a great way to brain-dump all your ideas before you try to narrow it down. I keep a running list of ideas for projects in the back of my sketchbook as they occur to me throughout the year, since there’s no way I’d be able to remember them all in April otherwise.

Whatever method I’m using, I like to brainstorm on paper with a pen or pencil – I feel more creative that way. But if you’re a tech person, feel free to do this step with online notes or diagrams.

And keep track of those ideas you didn’t use – you may use them in a future year, or just for other projects. I’m a big believer that no creative effort is ever wasted, even if you don’t turn it into something tangible right away.

Narrow it down.
My problem isn’t usually coming up with ideas, but narrowing it down to the one I want to focus on next!

Ask yourself:

  • What sparks my interest? What am I passionate about?
  • What do I have time for? To really stick with something for 100 days, it can’t take up too much of your time. Aim for 30 minutes a day, tops, unless you have way more free time than I do. Fifteen minutes would be even better. The official guide recommends 5-10 minutes a day, but that didn’t seem realistic for me.
  • What do I have materials for? You don’t want to spend a lot of money buying new stuff for this project. And this year we have the special consideration that many of us aren’t able to be out and about much (or at all), so the project has to be something you can do from home with what you have on hand.
  • What do I have space for? For example, if you travel a lot, pick something small you can bring along with you wherever you go.
  • Am I the kind of person who needs specific rules and structure, or do I like to keep things loose? Some people get really specific – 100 embroideries of endangered animals or 100 days of illustrations inspired by song lyrics about nature – and some people keep it more general, like just sharing their sketchbook spread daily. My advice is to be pretty specific, so you have clear direction and focus to inspire ideas, but not so specific that you’ll run out of ideas.

If you really can’t decide, ask others to vote on your top choices – after narrowing it down to three choices I took a family poll this year and one was a clear winner. You could also ask your Instagram followers, your writing group, your mom group or any other group of people whose opinions you value.

Keys to success.

Keep it simple.
You’ll be more likely to stick to it if you pick something you can do in half an hour or less every day. There are going to be days when you have deadlines or have to get dinner on the table or are dealing with life and just don’t have a ton of time to devote to the project, but if it’s something relatively quick, you can still knock out that day’s installment and get on with things.

Pick something you won’t be bored with.
Most importantly, pick something you want to do every day for the next 100 days. Pause a moment here to do the math and realize that 100 days from April 7 is July 15. That’s a lot of days!

Use the Reflection Guide worksheet.
This sheet from The 100 Day Project encourages you to think of things like three ways I can simplify my project, what materials I’ll need, how I’ll make time for the project, what I’ll do to get back on track if I miss a day and how I’ll celebrate the 100th Day.

Let go of perfection.
This project is all about the process and the showing up every day. To tell you the truth, there were some drawings last year I didn’t love, that just didn’t turn out the way I was hoping, and it was hard to post those on Instagram and show the world something imperfect. But the fact that I did one every day meant a lot to me.

Share.
Announce what you’re doing to the world – put it on Instagram, tweet it, tell your friends – seriously, once I started telling people in my daily life what I was doing (which was somehow harder than telling the entire internet, go figure), I became accountable to a lot of people IRL, in addition to Instagram followers, who wanted to know what the next weed was going to be!

Still need ideas?
Some of other people’s past projects to inspire you:

I can’t wait to see what you come up with!

It’s a Wrap: Reusable Gift Wrap Tutorial

Reusable fabric gift wrap tutorial by Lellobird

Reusable fabric gift wrap tutorial by Lellobird

Two of the most consistently popular topics from my Pinterest boards lately have been sustainable packaging and furoshiki, so I thought I’d combine those two topics with a timely twist and explore sustainable gift wrap.

You’ve probably heard the oft-quoted statistic that if every American family wrapped three presents in reused materials, it would save enough paper to cover 45,000 football fields. That statistic is kind of overwhelming when you think about it, but just like with anything else, you do what you can with what you have where you are. For me, that starts with using re-usable gift wrapping whenever possible.

A couple years ago I switched from using wrapping paper for most of our holiday gifts to using cloth wrapping, and while we’re not perfect about it, it does feel really good not to be throwing away bags of barely-used wrapping paper on Christmas morning.

The simplest way to wrap gifts using fabric is just to use a square or rectangle of fabric, either hemmed or cut with pinking shears, which you can use pretty much the same way you’d use a piece of paper to wrap a gift, and then tie it up with ribbon (or get fancy with furoshiki).

The first year we used fabric wrapping, I made simple bags (basically just a piece of fabric folded in half and hemmed on two sides) that can be tied off with ribbon. They sew up fast, work great and are still going strong. If you want to get fancier, try making a bag with an attached ribbon, a drawstring bag or this cute fabric gift bag with a built-in ribbon from A Quilter’s Table – it’s next on my list of ideas to try.

This year I decided to try to make some wrapping with the ribbon built-in, to make wrapping extra simple. It’s very simple – just a square of fabric with ribbons attached at two opposite corners – but it wraps up into a pretty official-looking gift.

Reusable fabric gift wrap tutorial by Lellobird

My first attempt started with a 36×36″ (about 91.5 cm square) piece of fabric, which would be great for bigger gifts, but kind of overwhelmed a book, which is a pretty common gift from me. So on version 2.0, I started with a 20×20″ (about 51 cm square) piece of fabric, which was much more manageable (and, if you’re starting with a yard of fabric, leaves you with a 16″ wide strip you can turn into a gift bag). You can scale the square up or down depending on what you’re wrapping.

For each wrap, you’ll need:
– 20″x20″ piece of fabric (or size of your choice)
– 4 feet of matching ribbon
– thread

A note on fabric: I used regular old cotton, because that’s what I had on hand, but it might be nice to use a fabric with a little sheen to it, like Spoonflower’s Organic Cotton Sateen – just don’t use anything too thick or it will be hard to wrap.

Reusable fabric gift wrap tutorial by Lellobird

A note on ribbon: I used 1.5″ and 2″ wide satin ribbon, because it has a nice shine and it’s what they had at the fabric outlet I frequent. To keep the ribbon from fraying, you can melt the ends ever-so-slightly with a flame – now, normally putting me and a flame together is a bad idea, but I managed to seal up the ends of the ribbons without incinerating anything – the trick is to put the ribbon near the flame but not in it, and keep it moving. WikiHow (scroll down to the third option) has pretty clear instructions. Whatever method you choose, start with sharp sewing scissors so you get a clean cut, and cut at a 45-degree angle, either across the ribbon or with the ribbon folded in half to make a notch. (Btw, if you need tips for tying a pretty bow with that ribbon, check out this video.)

Here’s what you do:

Reusable fabric gift wrap tutorial by Lellobird

1. Trim off any selvage (side note: The British “selvedge” just makes so much more sense than the American spelling, doesn’t it?) and cut your fabric into a square.

Reusable fabric gift wrap tutorial by Lellobird

2. With the right-side of the fabric down, press up 1/2″ all the way around.

Reusable fabric gift wrap tutorial by Lellobird

3. Because I wanted to practice mitred corners, I took the extra step and sewed mitred corners. I could try to explain to you how to sew a mitred corner, but By Hand London does it much better. If you find mitred corners daunting or fussy, skip it and just make square corners. Most people will be so impressed that you made wraps that they won’t care about the corners. If you’re not doing mitred corners, just fold and press another 1/2″ all the way around to give it a nice finished edge.

Reusable fabric gift wrap tutorial by Lellobird

4. Fold one corner toward the wrong side if the fabric, making a little triangle, until the base of the triangle you’re creating matches the width of your ribbon (just look at the picture; I can’t explain it).

Reusable fabric gift wrap tutorial by Lellobird

5. Pin the ribbon on top of your corner/triangle, folding the raw edges of the ribbon under. Make sure if your ribbon has a wrong side that the wrong side is facing up (so your fabric wrong-side and your ribbon wrong-side are the same direction).

6. Repeat on the opposite corner.

Reusable fabric gift wrap tutorial by Lellobird

7. Whether you’ve mitred or not, sew all the way around the hem, ducking in on the ribbon corners to follow the edge of the ribbon.

That’s it! It took me about an hour to make one wrap, but that time included figuring out what I was doing as I went along, setting up my Spotify playlist to accompany my sewing, burning myself on an iron, discovering the machine was threaded wrong and having to rip out my seam and start over…so, really just a typical day sewing for me, but I think it would get faster with each iteration.

Reusable fabric gift wrap tutorial by Lellobird

To wrap, lay your item diagonally in the middle of the cloth. Fold in the top and bottom (the non-ribbon corners). Then criss-cross the ribbon corners over the back (you can tie them in a half-knot, but it seemed bulky to me). Pull them around to the front and tie in a pretty bow. If your item is smaller, wrap the ribbons around in the other direction, too, before tying.

Reusable fabric gift wrap tutorial by Lellobird

Reusable fabric gift wrap tutorial by Lellobird

Note: If I cared terribly about surprises, I might line this wrapping, in which case you don’t need to do mitred corners; you can just put the two pieces of fabric right-sides-together and sew them together, leaving a little gap to turn it right-side-out and then top-stitch it all the way around. You could even make it reversible by lining it with a contrasting fabric. It will be a little bulkier when wrapping, though.

If you’re not up for sewing, there are lots of other options for re-used or reusable wrapping, from magazine pages to mason jars. Or try wrapping gifts in pre-made tea towels like these from Trader Joe’s or IKEA – or, you know, something fancy. There’s even a tutorial for making pretty no-sew fabric bags using double-sided tape, if you’re a seat-of-the-pantser.

Lastly, if you want something sustainable inside the wrapping, too, consider these gift ideas from Imperfect Foods – or, as I heard it put the other day: Eat it, drink it, spend it, burn it.

Whatever and however you celebrate, I hope you have a fabulous end to 2019 and a happy, healthy 2020!

Fabrics used:
The Lost Mitten Barkcloth
Smoochies
Frosty Frolic
See more of my wintry designs here.

Reusable fabric gift wrap tutorial by Lellobird