An antidote to boredom

Glass jar photo by Dan Dennis

Glass jar photo by Dan Dennis

Ah, those dreaded words from a kid, “I’m bored.” (Right up there with “My head itches.”) Especially when you’re up to your eyeballs yourself in plenty of things that need to be done. There are lots of fun projects you can do together (plant a garden, bake some muffins (this recipe is a favorite in our house), make pulled string art) or places to go as a family (library, museum, nature walk), but sometimes you just need half an hour (or 10 minutes!) of quiet time while the kids entertain themselves.

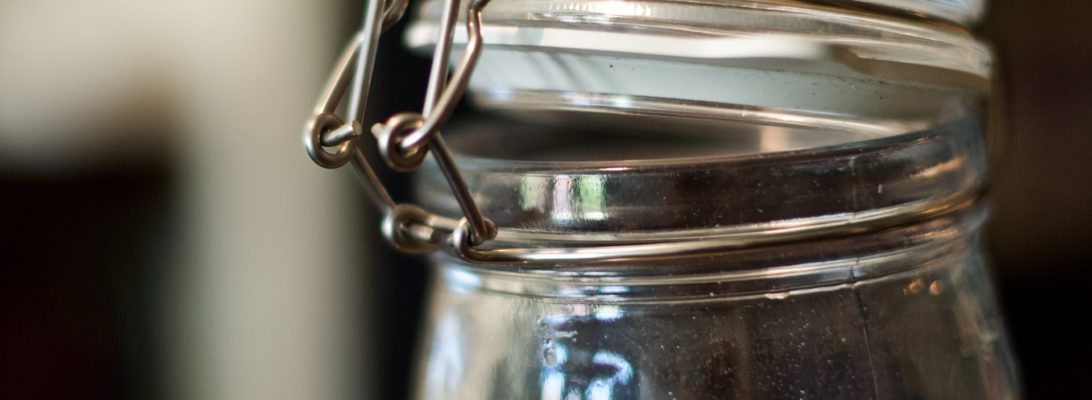
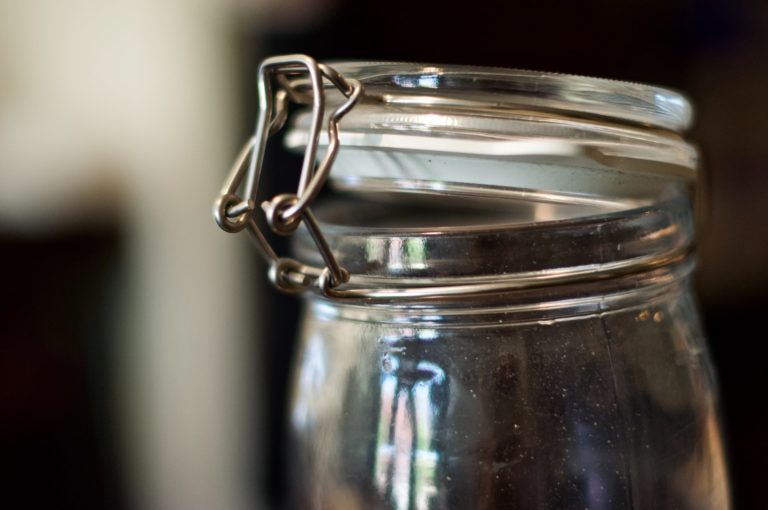
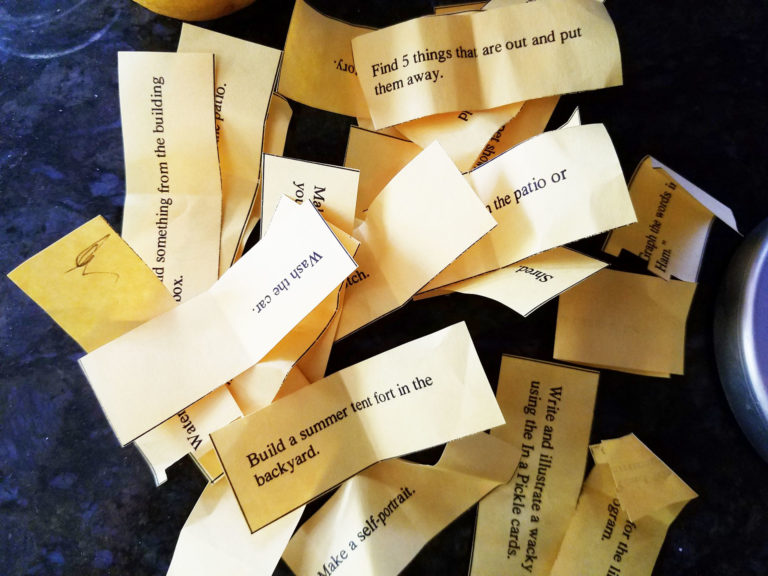
That’s where the I’m Bored jar comes in. It contains slips of paper with activities on it that kids can do largely by themselves (you might need to help them set up, depending on how old they are) without too many fancy materials – it’s a mix of educational things, arts & crafts and a few chores. They pick a slip from the jar and do the thing. No whingeing allowed.

The sweet spot for this list is probably about 5-8 years old – old enough to read the slips and work independently, but young enough to be excited about exploring the world around them. If your kids are older or younger, you can pick and choose the activities that would work for them, modify them slightly or add in your own ideas. And, obviously, every kid is different – if your kid doesn’t have a particular skill or moves in a different way or can’t go outside, you can adapt the ideas to work for your family and situation.

How to:

  • If you’re using the slips I made (see download below) as-is, print them out and cut them apart. Tip: If you let the kids do the cutting they’ll be less perfect, but you can count it as building fine motor skills! For extra eco-friendliness, print them on the back of some of the colorful handouts or worksheets your kid brought home from school at the beginning of summer break!
  • Use any container you have on hand – it could be a mason jar if you have a stash of them, but it could also be a sand bucket for that summertime feel, or an upcycled peanut butter jar, or a shoebox. Use your imagination and challenge yourself not to buy something new! The only rule is that it should be big enough to easily get your hand inside to pull out a slip. Your kids’ first activity could even be decorating the container so everyone knows it’s special and feels invested in it. (If you’re an overachiever, see these blogs for some fun ideas for making your jar pretty with washi tape and other fun things.)
  • When you’re ready to do an activity, pull out a slip and do the thing. It can be useful to have some instructions and basic art materials (paper, markers, crayons, watercolors, pencils, glue, scissors, ink pads) and cleaning supplies (a duster, some rags, a dustpan and broom – obviously they shouldn’t be using anything dangerous on their own) cued up in a spot where everyone can reach them so kids can dive right in without too much management from you.
  • Remember my rule from before: No whingeing. You get what you get and you don’t throw a fit, as we used to say in preschool.
  • After you use a slip, either put it back in the jar to use again or set it aside for future use.

P.S. There’s nothing that says adults can’t use these ideas, too – if you’re looking for inspiration, go ahead and try drawing things in your favorite color or playing with sidewalk chalk, and see if it doesn’t make you feel like a kid again! I give you permission to skip dusting the baseboards.

I'm Bored Jar Slips

50 Summer Activity Ideas

  1. Work a jigsaw puzzle.
  2. Build something with materials from the recycling bin.
  3. Draw with sidewalk chalk.
  4. Put on a puppet show. You could even make your own puppets from socks, bags or craft sticks.
  5. Build a fort, inside or outside. (Couches, tents, beds, chairs and patio tables are all good fort starters!)
  6. Draw a self-portrait.
  7. Find 5 interesting things outside/in the yard.
  8. Read for 15 minutes. (Bonus points if you’re also signed up for your local library’s summer reading program)
  9. Draw an obstacle course with sidewalk chalk (for yourself or even for your neighbors!) encouraging passersby to hop, skip, jump, etc. down the sidewalk.
  10. Make a magnetic poem on the fridge.
  11. Make thumbprint art.
  12. Write and/or illustrate a list of 5 things that make you happy.
  13. Find 5 things that are out and put them away.
  14. Write a haiku.
  15. Write (and illustrate, if you want) a wacky story using Story Cubes, story stones (you can make your own), In a Pickle cards or other prompts.
  16. Write a letter or email to your favorite author. (Suggestions for things to include in your letter: What do you like about this author’s book? Who is your favorite character and why? What questions would you like to ask the author?)
  17. Pick an art prompt to draw. (There are lots of fun prompts on the web and Instagram, but Tinkerlab has some that are especially good for kids.)
  18. Write an acrostic poem with your name or another favorite word.
  19. Write a letter or postcard to someone and mail it.
  20. Draw all the things you can think of that come in your favorite color.
  21. Draw everything you can see from where you’re sitting.
  22. Clean all the door jambs you can reach with a wet sponge or Magic Eraser (they’re probably your fingerprints, anyway).
  23. Call or email (or Facetime, etc. – this one may need a screen, depending on how you and your subject communicate best) an older relative or family friend and interview them about their childhood.
  24. Pair up all the socks from the clean laundry basket or sort laundry into piles for each member of your family.
  25. Draw a map of your house, your neighborhood or your favorite place (real or imaginary). Put in lots of details.
  26. Make paper airplanes and see which ones flies the farthest.
  27. Sweep the floor/patio/sidewalk/garage (pick one).
  28. Make something with Legos. (Need an idea? Pick something from this list.)
  29. Play with play dough.
  30. Paint some rocks and leave them for neighbors to find next time you go for a walk.
  31. Make a collage using an old magazine or calendar. (Ask a grown-up before cutting it up!)
  32. Draw an animal that’s a mix of two animals and make up a name for it – what about a mouseraffe (part mouse, part giraffe), or a monken (part monkey, part chicken)? Pretend you’re a scientist who discovered this animal and write about it – what does it like to eat? Where does it live? Is it fierce or friendly?
  33. Dust a shelf or table.
  34. Decorate some bookmarks for yourself or to give to friends or leave in your local Little Free Library.
  35. See how many dominoes you can line up and knock over in a chain. Can you make them go up ramps (books make good ramps) or around furniture legs?
  36. Go through your school (or camp) backpack and empty out anything that doesn’t belong or needs to be washed, replaced, recycled or returned.
  37. Play a board game or card game. (If you’re playing by yourself, try something like Memory).
  38. Make up your own board game.
  39. Make a town with Legos, blocks or boxes for your toy cars or people or animals to live in.
  40. Water the plants.
  41. Make a family newspaper with articles and illustrations about what your family is doing.
  42. Walk through the house and find 5 things that belong in your room and put them away.
  43. Write (or draw) a story or a comic.
  44. Put on some music and have a dance party.
  45. Dust the baseboards.
  46. Invent a superhero and draw them. What are their special powers? Where do they live?
  47. Make a treasure map.
  48. Go through your books or toys and pick 5 things you could give away.
  49. Find something in the house or yard for each color of the rainbow.
  50. Put away anything that’s on the floor in your bedroom.

Here are all the above suggestions in a handy 3-page PDF printable. This printable is free for your personal, non-commercial use – just sign up for my newsletter (also free, and I promise not to spam you, and if you’re already on my list it won’t double you up!) to download the PDF:

“I’m Bored” Summer Activities Printable

Photo of jar by Dan Dennis on Unsplash

Choosing a 100 Day Project

Mind map for brainstorming a 100 Day Project

Mind map for brainstorming a 100 Day Project

The 100 Day Project launches next week, April 7, 2020. And, of course because I’m a pantser, to borrow a term from NaNoWriMo, I didn’t officially decide until yesterday what my project this year is going to be.

Thinking ahead 100 days seems extra poignant this year – personally, I feel a little anxiety but also a strong sense of hope in looking ahead that far, and realizing that there will be an end to all this craziness, whenever that may be.

“The great surrender is the process; showing up day after day is the goal. For the 100-Day Project, it’s not about fetishizing finished products—it’s about the process.” – founder Elle Luna

This year more than ever I feel like really getting into the process of making is beneficial for me – losing myself in art for a little while helps keep me sane.

This might be a good year to do a collaborative project – like drawing the same thing as a friend every day, or emailing a friend a drawing for them to finish, or making up prompts for each other, or illustrating your friend’s song or poem – as a way to keep in touch with someone you can’t see in person.

For anyone else still on the fence about what to do, I thought it might be helpful to take you through my process selecting a project, and a few of the things I learned doing the 100 Day Project for the first time last year.

I spent some time reading other people’s assessments of their own projects and pondering my experiences. I think this line from Annabel Tempest sums it up nicely: “although [it] didn’t make masses of perfect work it did make masses of perfect moments.” If you think of it not as turning out 100 professional-quality projects but as a journey, it takes some of the pressure off. Last year I learned a lot not just about weeds and about drawing plants and using gouache and hand-lettering, but also about the places around me, and my work ethic and style.

The great thing about this project is that there are no rules – it’s all about personal growth, so if you miss a day or change your mind halfway through or whatever, it’s okay.

Here’s my process:

Brainstorm.
Look at your hobbies (existing ones or ones you’d like to develop), cruise through other people’s past projects online, start a Pinterest board of images that inspire you.

Ask yourself:

  • What am I curious about?
  • Is there a skill I’ve been wanting to learn or develop, like hand-lettering or knitting?
  • What do I have on hand? What do I want to use up?
  • Is there something I’m aspiring to, like children’s book illustration, that I’d like to add to my portfolio? (I heard someone – I wish I could remember who – say the other day, “Make the kind of art you want to sell.” I can’t decide if that’s brilliant advice or incredibly jaded – probably a bit of both.)
  • What’s interesting in my house or neighborhood?
  • What wouldn’t I mind drawing or exploring 100 times??

Some ways to brainstorm:

Take a look around.
Last year, I looked at all the weeds in my yard and at the baseball and soccer fields where I spent every weekend minute watching my kids’ games, and realized I wanted to know more about them.

This year, stuck at home, my top three ideas all came from looking around my studio and thinking about what I had on hand. I love ephemera, and have a big collection of outdated library circulation cards (you’ve probably seen my fabrics and prints), as well as pretty but dilapidated old books (too many of them, according to my husband), a bunch of old stamps and a jar containing pretty much every fortune cookie fortune I’ve ever gotten, as well as those I’ve begged off friends and family.

Doodle.
Because I’m a visual person (duh), I like to brainstorm with thumbnails – I’ll take a blank sheet of paper and draw a million little doodles and ideas, with one thing leading to another.

Map it.
When my kids were in preschool, their teachers used to help them figure out what the class should explore next using mind maps. They’d ask the kids to come up with a topic, and then the class would brainstorm related ideas that they’d write down on clouds shooting off the main idea, until they had a whole web of ideas and angles to explore. I’ve used this same method while leading a meeting with a multi-national company to help them figure out what info needed to go on their website, so it’s pretty flexible. This technique is actually a good analog for how my brain works, so it works well for me and helps me corral ideas a bit around a theme. (example above)

Make a list.
If you’re more of a linear thinker, a list can be a great way to brain-dump all your ideas before you try to narrow it down. I keep a running list of ideas for projects in the back of my sketchbook as they occur to me throughout the year, since there’s no way I’d be able to remember them all in April otherwise.

Whatever method I’m using, I like to brainstorm on paper with a pen or pencil – I feel more creative that way. But if you’re a tech person, feel free to do this step with online notes or diagrams.

And keep track of those ideas you didn’t use – you may use them in a future year, or just for other projects. I’m a big believer that no creative effort is ever wasted, even if you don’t turn it into something tangible right away.

Narrow it down.
My problem isn’t usually coming up with ideas, but narrowing it down to the one I want to focus on next!

Ask yourself:

  • What sparks my interest? What am I passionate about?
  • What do I have time for? To really stick with something for 100 days, it can’t take up too much of your time. Aim for 30 minutes a day, tops, unless you have way more free time than I do. Fifteen minutes would be even better. The official guide recommends 5-10 minutes a day, but that didn’t seem realistic for me.
  • What do I have materials for? You don’t want to spend a lot of money buying new stuff for this project. And this year we have the special consideration that many of us aren’t able to be out and about much (or at all), so the project has to be something you can do from home with what you have on hand.
  • What do I have space for? For example, if you travel a lot, pick something small you can bring along with you wherever you go.
  • Am I the kind of person who needs specific rules and structure, or do I like to keep things loose? Some people get really specific – 100 embroideries of endangered animals or 100 days of illustrations inspired by song lyrics about nature – and some people keep it more general, like just sharing their sketchbook spread daily. My advice is to be pretty specific, so you have clear direction and focus to inspire ideas, but not so specific that you’ll run out of ideas.

If you really can’t decide, ask others to vote on your top choices – after narrowing it down to three choices I took a family poll this year and one was a clear winner. You could also ask your Instagram followers, your writing group, your mom group or any other group of people whose opinions you value.

Keys to success.

Keep it simple.
You’ll be more likely to stick to it if you pick something you can do in half an hour or less every day. There are going to be days when you have deadlines or have to get dinner on the table or are dealing with life and just don’t have a ton of time to devote to the project, but if it’s something relatively quick, you can still knock out that day’s installment and get on with things.

Pick something you won’t be bored with.
Most importantly, pick something you want to do every day for the next 100 days. Pause a moment here to do the math and realize that 100 days from April 7 is July 15. That’s a lot of days!

Use the Reflection Guide worksheet.
This sheet from The 100 Day Project encourages you to think of things like three ways I can simplify my project, what materials I’ll need, how I’ll make time for the project, what I’ll do to get back on track if I miss a day and how I’ll celebrate the 100th Day.

Let go of perfection.
This project is all about the process and the showing up every day. To tell you the truth, there were some drawings last year I didn’t love, that just didn’t turn out the way I was hoping, and it was hard to post those on Instagram and show the world something imperfect. But the fact that I did one every day meant a lot to me.

Share.
Announce what you’re doing to the world – put it on Instagram, tweet it, tell your friends – seriously, once I started telling people in my daily life what I was doing (which was somehow harder than telling the entire internet, go figure), I became accountable to a lot of people IRL, in addition to Instagram followers, who wanted to know what the next weed was going to be!

Still need ideas?
Some of other people’s past projects to inspire you:

I can’t wait to see what you come up with!

It’s a Wrap: Reusable Gift Wrap Tutorial

Reusable fabric gift wrap tutorial by Lellobird

Reusable fabric gift wrap tutorial by Lellobird

Two of the most consistently popular topics from my Pinterest boards lately have been sustainable packaging and furoshiki, so I thought I’d combine those two topics with a timely twist and explore sustainable gift wrap.

You’ve probably heard the oft-quoted statistic that if every American family wrapped three presents in reused materials, it would save enough paper to cover 45,000 football fields. That statistic is kind of overwhelming when you think about it, but just like with anything else, you do what you can with what you have where you are. For me, that starts with using re-usable gift wrapping whenever possible.

A couple years ago I switched from using wrapping paper for most of our holiday gifts to using cloth wrapping, and while we’re not perfect about it, it does feel really good not to be throwing away bags of barely-used wrapping paper on Christmas morning.

The simplest way to wrap gifts using fabric is just to use a square or rectangle of fabric, either hemmed or cut with pinking shears, which you can use pretty much the same way you’d use a piece of paper to wrap a gift, and then tie it up with ribbon (or get fancy with furoshiki).

The first year we used fabric wrapping, I made simple bags (basically just a piece of fabric folded in half and hemmed on two sides) that can be tied off with ribbon. They sew up fast, work great and are still going strong. If you want to get fancier, try making a bag with an attached ribbon, a drawstring bag or this cute fabric gift bag with a built-in ribbon from A Quilter’s Table – it’s next on my list of ideas to try.

This year I decided to try to make some wrapping with the ribbon built-in, to make wrapping extra simple. It’s very simple – just a square of fabric with ribbons attached at two opposite corners – but it wraps up into a pretty official-looking gift.

Reusable fabric gift wrap tutorial by Lellobird

My first attempt started with a 36×36″ (about 91.5 cm square) piece of fabric, which would be great for bigger gifts, but kind of overwhelmed a book, which is a pretty common gift from me. So on version 2.0, I started with a 20×20″ (about 51 cm square) piece of fabric, which was much more manageable (and, if you’re starting with a yard of fabric, leaves you with a 16″ wide strip you can turn into a gift bag). You can scale the square up or down depending on what you’re wrapping.

For each wrap, you’ll need:
– 20″x20″ piece of fabric (or size of your choice)
– 4 feet of matching ribbon
– thread

A note on fabric: I used regular old cotton, because that’s what I had on hand, but it might be nice to use a fabric with a little sheen to it, like Spoonflower’s Organic Cotton Sateen – just don’t use anything too thick or it will be hard to wrap.

Reusable fabric gift wrap tutorial by Lellobird

A note on ribbon: I used 1.5″ and 2″ wide satin ribbon, because it has a nice shine and it’s what they had at the fabric outlet I frequent. To keep the ribbon from fraying, you can melt the ends ever-so-slightly with a flame – now, normally putting me and a flame together is a bad idea, but I managed to seal up the ends of the ribbons without incinerating anything – the trick is to put the ribbon near the flame but not in it, and keep it moving. WikiHow (scroll down to the third option) has pretty clear instructions. Whatever method you choose, start with sharp sewing scissors so you get a clean cut, and cut at a 45-degree angle, either across the ribbon or with the ribbon folded in half to make a notch. (Btw, if you need tips for tying a pretty bow with that ribbon, check out this video.)

Here’s what you do:

Reusable fabric gift wrap tutorial by Lellobird

1. Trim off any selvage (side note: The British “selvedge” just makes so much more sense than the American spelling, doesn’t it?) and cut your fabric into a square.

Reusable fabric gift wrap tutorial by Lellobird

2. With the right-side of the fabric down, press up 1/2″ all the way around.

Reusable fabric gift wrap tutorial by Lellobird

3. Because I wanted to practice mitred corners, I took the extra step and sewed mitred corners. I could try to explain to you how to sew a mitred corner, but By Hand London does it much better. If you find mitred corners daunting or fussy, skip it and just make square corners. Most people will be so impressed that you made wraps that they won’t care about the corners. If you’re not doing mitred corners, just fold and press another 1/2″ all the way around to give it a nice finished edge.

Reusable fabric gift wrap tutorial by Lellobird

4. Fold one corner toward the wrong side if the fabric, making a little triangle, until the base of the triangle you’re creating matches the width of your ribbon (just look at the picture; I can’t explain it).

Reusable fabric gift wrap tutorial by Lellobird

5. Pin the ribbon on top of your corner/triangle, folding the raw edges of the ribbon under. Make sure if your ribbon has a wrong side that the wrong side is facing up (so your fabric wrong-side and your ribbon wrong-side are the same direction).

6. Repeat on the opposite corner.

Reusable fabric gift wrap tutorial by Lellobird

7. Whether you’ve mitred or not, sew all the way around the hem, ducking in on the ribbon corners to follow the edge of the ribbon.

That’s it! It took me about an hour to make one wrap, but that time included figuring out what I was doing as I went along, setting up my Spotify playlist to accompany my sewing, burning myself on an iron, discovering the machine was threaded wrong and having to rip out my seam and start over…so, really just a typical day sewing for me, but I think it would get faster with each iteration.

Reusable fabric gift wrap tutorial by Lellobird

To wrap, lay your item diagonally in the middle of the cloth. Fold in the top and bottom (the non-ribbon corners). Then criss-cross the ribbon corners over the back (you can tie them in a half-knot, but it seemed bulky to me). Pull them around to the front and tie in a pretty bow. If your item is smaller, wrap the ribbons around in the other direction, too, before tying.

Reusable fabric gift wrap tutorial by Lellobird

Reusable fabric gift wrap tutorial by Lellobird

Note: If I cared terribly about surprises, I might line this wrapping, in which case you don’t need to do mitred corners; you can just put the two pieces of fabric right-sides-together and sew them together, leaving a little gap to turn it right-side-out and then top-stitch it all the way around. You could even make it reversible by lining it with a contrasting fabric. It will be a little bulkier when wrapping, though.

If you’re not up for sewing, there are lots of other options for re-used or reusable wrapping, from magazine pages to mason jars. Or try wrapping gifts in pre-made tea towels like these from Trader Joe’s or IKEA – or, you know, something fancy. There’s even a tutorial for making pretty no-sew fabric bags using double-sided tape, if you’re a seat-of-the-pantser.

Lastly, if you want something sustainable inside the wrapping, too, consider these gift ideas from Imperfect Foods – or, as I heard it put the other day: Eat it, drink it, spend it, burn it.

Whatever and however you celebrate, I hope you have a fabulous end to 2019 and a happy, healthy 2020!

Fabrics used:
The Lost Mitten Barkcloth
Smoochies
Frosty Frolic
See more of my wintry designs here.

Reusable fabric gift wrap tutorial by Lellobird

Monday Inspiration: Los Angeles

Exterior of Petersen Automotive Museum in LA

Exterior of Petersen Automotive Museum in LA

Recently we took a trip to Los Angeles. Being a staunch Northern Californian I was raised to think of LA as a soul-less wasteland of smog and cars (sorry!), but every time I go I discover something new and interesting. This time around we took in some of the region’s architecture (of which I took terrible pictures for some reason), including the Petersen Automotive Museum.

Not being a big car person I wasn’t sure what to expect, but my favorite thing about this museum turned out to be the montage of photos Pixar designers took on their cross-country road trip to get ideas for the look of the original Cars movie. As a designer, I love how obsessively they research every detail, even things that don’t ultimately make it into the final movie. Similarly, Josh Holtsclaw has a great post on his site about the look they created for The Incredibles films, including complete branding packages for entities like the hotel where the Parr family stays.

Since I was reading Susan Orlean’s fascinating The Library Book at the time (and because I’m a library nerd), I also got interested in the history of the LA Central Library building, which led me to the Los Angeles Conservancy (check out their walking tours) and their amazing branding package created by the design firm YYES. There’s also a nice case study about the rebranding, which features ultra-simple, interchangeable icons of iconic LA buildings, here.

I love it when travel not only provides a break from the daily routine, but also opens up my eyes to new design ideas. What travel destination inspires you?

Tea Towel Gift Pairings

Bottle gift wrapped with Orange, Orange, Lemon, Lime tea towel by Lellobird

Spoonflower has 50% off on fat quarters for the next week (through November 8) – which means this is the perfect time to scoop up some tea towels for holiday gifting.

Better yet, pair your tea towels with a book, plant, baked goods or another item and use the towel as an eco-friendly wrapping – you’ll save the paper, and it’s like getting two gifts in one. Plus, if you start now, you might actually have time to sew up the towels before the holidays (unless you’re a really champion procrastinator like me, and then you’ll be hemming the night before your gift exchange).

With all the tea towel choices out there, you can find something that pairs with almost any gift idea or recipient – the hardest part may be choosing which one to use! (Or giving it away!)

Tea towels pair naturally with food- and kitchen-themed gifts, but anything small-ish will fit – here are some of my favorite ideas:

Plant gift wrapped with Windowsill tea towel by Lellobird

Bottle gift wrapped with Orange, Orange, Lemon, Lime tea towel by Lellobird

Cookbook gift wrapped with Bakers Gonna Bake tea towel by Lellobird

Jar of honey gift wrapped with Honeycomb tea towel by Lellobird

Book gift wrapped with Jane's Words tea towel by Lellobird

Speaking of furoshiki, there are a ton more furoshiki ideas, plus instructions for hemming your towels, on the My Poppet website.

I put together a Pinterest board with examples of all the above uses plus a few more – check it out here.

Happy gifting!

In the wild: Otter blanket

Weighted blanket by Weighted Works with Significant Otters fabric

As you know if you read my posts or follow me on Instagram, I love to see what people make from my designs! Melinda of Weighted Works recently sent me a photo of a weighted blanket made with my Significant Otters fabric on the front and minky on the back – just looking at it makes me want to crawl under it and take a nap!

According to Weighted Works, weighted blankets can help users feel more calm and relaxed, and can help manage the symptoms of insomnia, restless leg syndrome, autism, PTSD, nervous system disorders and anxiety.

Oddly enough, I actually noticed this effect the other day at the dentist’s office, when they put the lead apron on me for some x-rays – it felt so nice I got a little sleepy, which is saying a lot given how much I hate going to the dentist. Maybe I should have asked if I could wear it for the whole visit…

Bandage Stripe fabric

Sometimes I spend a ton of time carefully drawing a million details for a fabric or illustration…and sometimes I get a really simple idea that just works on the first try. “Bandage Stripe” was definitely the latter – it came together really quickly, but the colors make it special.

And I’m thrilled that this design came in 2nd place in this week’s Medical Professions themed contest at Spoonflower – thank you to everyone who voted!

I can see this fabric making great scrubs, an ice pack cover or a fun pouch to hold your first aid supplies – because every 5-year-old will tell you that boo boos feel better when you have a cool bandage (or bandage-themed accessories!).

First aid kit mockup with Bandage Stripe fabric by Lellobird

Do-gooding: Annual Report

Fundraising fabrics by Lellobird - image mockups by Roostery
Lellobird fabrics that raise money for charity, shown on mockups by Roostery.

I’ve selected several of my fabrics as fundraisers for specific charities, and I donate a portion of the proceeds from their sale every year. Thanks to all of you who purchased my designated fabrics and products this year, I was able to make donations to the following organizations in 2017:

International Rhino Foundation
Rhinos seem like such tough creatures, but due to poaching and habitat loss, all five rhino species are threatened with extinction. The IRF works for the survival of the world’s rhinos through conservation and research. I especially like the way they partner with local communities living near the rhino populations – many of them struggling for survival themselves – so the locals benefit from conservation efforts, too. Sales of Rhinoce-roses and Rhinoce-roses Tiny (and products made with them at Roostery) benefit the IRF.

Friends of the Oakland Public School Libraries
As a life-long library user, a one-time library employee and a long-time library volunteer, I was shocked to learn that 30% of OUSD schools – including 14 of the 17 high schools – don’t have working libraries. FOPSL’s goal is to have an up-to-date library at every OUSD school in order to support literacy and “provide access to quality literature, information and technology to all OUSD students.” Sales of the Library Tea Towel Calendar (also at Roostery) benefit FOPSL.

North Bay Fire Relief
I created my Tea & Hope Tea Towel (also at Roostery) explicitly to be a charity item, with proceeds going to a different non-profit every six months. The first cause I chose was the fires that burned through swaths of Sonoma and other North Bay counties in October 2017, which were darkening the sky to perpetual dusk even at my home 60 miles away as I was designing it.

The North Bay wildfires destroyed more than 8,900 structures and created problems both immediate and long-term for the area – officials estimate it will be 5-10 years before all the local infrastructure is rebuilt. We visited Sonoma recently and while the burn areas were sobering, it was inspiring to see signs everywhere thanking the first responders and confirming #sonomastrong.

I split my donation between the United Way Bay Area Northern California Wildfire Relief and Recovery Fund, which is helping with both immediate and long-term needs, and the Sonoma County Resilience Fund, geared toward helping with mid- to long-term needs and rebuilding.

For the first six months of 2018, the beneficiary of funds raised through sales of this tea towel will be the International Rescue Committee, which helps refugees and others suffering from humanitarian crises.

Heifer International
Last but not least, bees! I’ve been a long-time supporter of Heifer International because I like their model of not just giving a hand-out but a hand-up, giving things that help people improve their lives and then encouraging them to share with their communities. Bees provide honey for food and also help pollinate crops, increasing yields. This year, sales of my Bee Towel tea towel (also at Roostery) helped purchase two sets of honeybees for Heifer recipients.

Annual giving 2018 by Lellobird - infographic
And, because I can’t resist a good infographic, here’s how the donations break down:

None of these were huge donations, but they’re a start. Whether you can donate money or time, I encourage you to think about ways you can make your own corner of the world a better place in 2018, too.