
Today feels like kind of a dark day in the world with the news out of Brussels, so I thought I’d share a cheerful springtime craft to try and counter some of the sadness. Sometimes it just feels good to lose yourself for a little while in making something beautiful.
Fall is really my favorite season, but secretly I admire Spring’s enthusiasm, with plants and birds and color popping up all over the place. This garland captures a little of that exuberance. We made eggs since we were in an Easter frame of mind, but you could use the same technique to make butterflies, flowers, geometric shapes or whatever strikes your fancy.
Inspired by Emily Sanford’s Spoonflower blog post about blocking off areas with tape before painting with watercolor, we’ve been experimenting with negative space and washes of abstract color around here.
Someone recently gave us a giant pad of drawing paper, so we used that and cut each sheet into two 9×12″ pieces. It was sturdy enough to stand up to the watercolor.
First we cut strips of painter’s tape the width of our paper. The only tape I had on hand was really wide, so I cut it into narrower strips. As long as I had to cut it anyway, I used the fancy craft scissors on some of the strips to get a scalloped edge. We used plain blue painter’s tape because it’s what we had on hand, but other kinds of art tape would work, too.
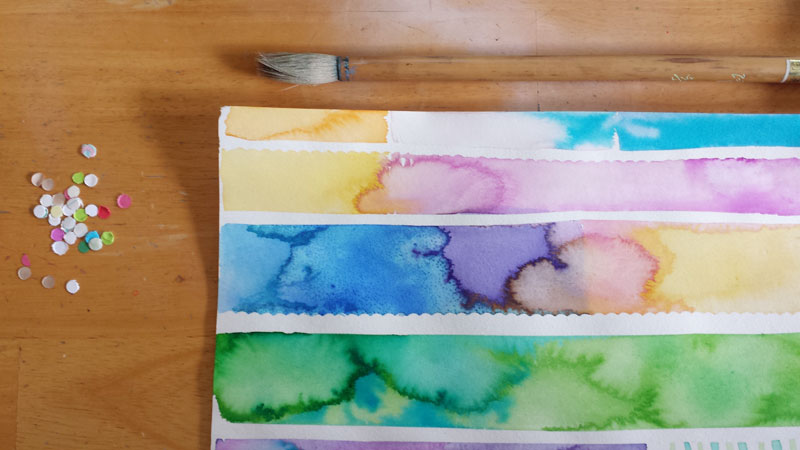
I’m trying to learn from the kids how to loosen up my painting style (kids are great mentors when it comes to art!), so we used big brushes, lots of water and lots of color. While the paint was still wet, we sprinkled sea salt in a couple places for special effects. All ages had fun playing with the washes of color and ways they combined.

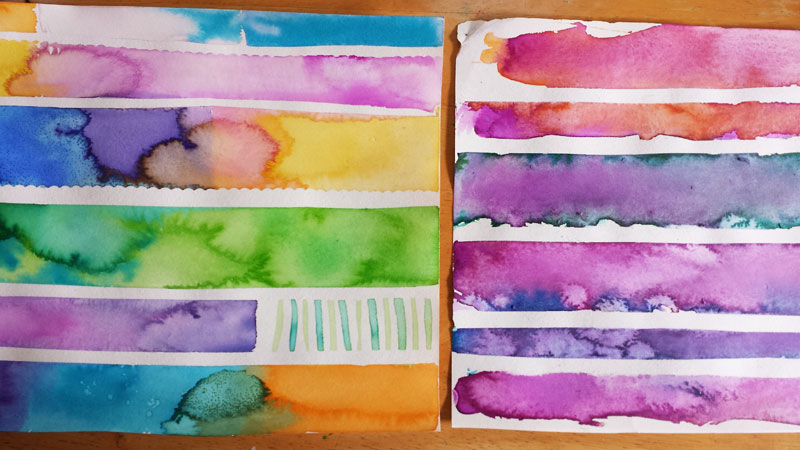
Once the paint dried (that step took almost 24 hours, so plan ahead), we peeled off the tape to reveal the white stripes on our eggs-to-be. The paper on the left is mine; the right is kid-made. Our tape took off a tiny bit of the top layer of the paper, but not enough to bother me.
Then I cut an egg-template, which you can download here — since it took me a solid half-hour of fiddling to make what I considered the perfect egg shape (they’re trickier than they look!), I figured I’d save you some time. I put lots of eggs on one page in case we wanted to color and cut out more eggs, but you really only need to cut out one for this project. Each egg is 4.5 inches tall.
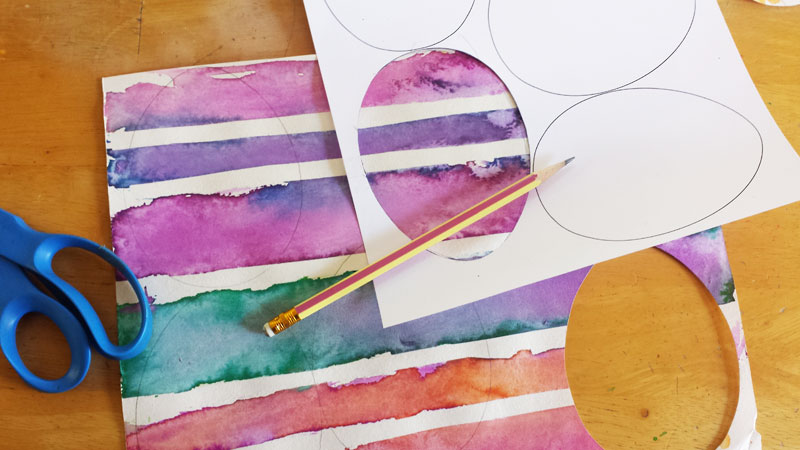
Lay the cut-out space over your painted paper and decide where you want your egg to be. I like using this method because you get to see exactly what the egg will look like. When you’re happy with the design, trace lightly around the inside of the cut-out shape with pencil, then cut along the pencil line.
You could attach the cut-out shapes on yarn, baker’s twine or ribbon. I just hung mine up with tiny clothespins, since we have an existing ribbon strung up that we use for garlands throughout the year, switching out the items.
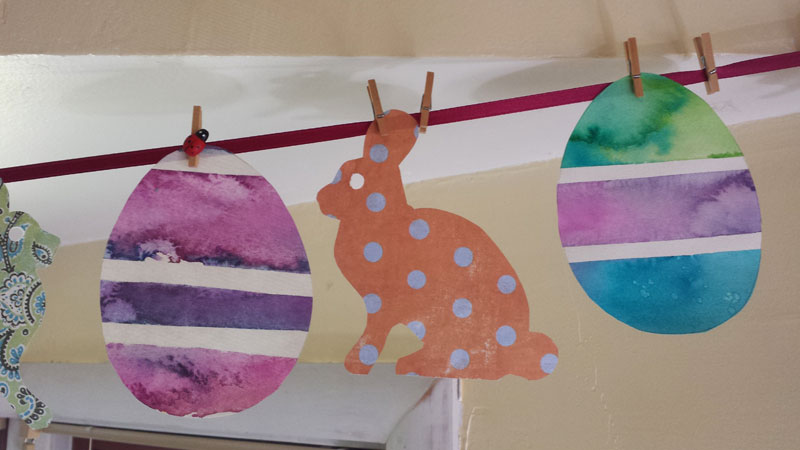
The bunnies are traced from the shape of an old notepad I had and cut out of scrapbook paper and other random papers we had around the house. The whole thing is happiness on a string!